Vim Cheatsheet
Extensive collection of vim basic to advanced Vim commands and plugins to enhance your vim text editing and coding experiences.
The power of Vim lies in its simplicity & customisation. You can customise Vim they way you need it. For your work requirements. That could mean keeping it super simple and just relying on a few commands, or it could mean loading in a tonne of plugins and configuring each one to behave as you want. Ive tried some really sophisticated vim configs, that were wonderously powerful and worked great until something broke. What i learnt was, it’s a lot more fun installing a new config then it is to fix one that you dont know much about. That is why this article aims to keep a simple Vim config. One that is as simple as Vim gets. And if it breaks it should be pretty simple to fix.
Furthermore article is also a vim cheatsheet, As there is simply too many Vim commands to store in my simple brain, its an affective strategy to keep a Vim Cheatsheet.
VIM Modes
Vim has several modes, each designed for a specific purpose. Here’s a breakdown of the main modes in Vim:
Normal Mode
- Default mode when you open Vim.
- Used for navigating and making simple edits (e.g., deleting, copying, pasting text).
- Press Esc to return to Normal Mode from other modes.
Insert Mode
- For entering and editing text.
- To enter Insert Mode, press
i, I, a, A, o, or O. - Press i
Escto exit Insert Mode and return to Normal Mode.
Troubleshooting If Vim is stuck in insert mode ctrl [ to exit.
Visual Mode
- Used to select text.
- Enter by pressing
vfor character selection,Vfor line selection, orCtrl+vfor block (or column) selection. - Once selected, you can perform commands (like delete, copy, or change) on the selection.
- Press Esc to exit Visual Mode.
- Navigate in visual mode using
j (down), k (up), h (right), l (left)
Easy way to remember the keys (j)ump down, (k)ite up, (h)ieve right, (l)eft
Replace Mode (i never use replace mode)
- Similar to Insert Mode, but characters are replaced instead of inserted.
Enter by pressing Rin Normal Mode.- Press Esc to return to Normal Mode.
Search and Replace
- Utilizes a regular expression for searching every occurrence of [pattern] and replaces it with [replacement] without asking for confirmation.
1
   :%s/[pattern]/[replacement]/g
Now if your pattern contains forward slashes such as a https:// protocal you can use the # separator instead
This pattern is good for doing search and replace on an sql file.
1
   :%s#[pattern]#[replacement]#g
- Same as the previous command but asks for confirmation before replacing each instance of [pattern] with [replacement].
1
  :%s/[pattern]/[replacement]/gc
- Instead of replacing every single instance of [pattern] on your file, this Vim command will replace only those [pattern] that are in the current line with [replacement].
1
   :s/[pattern]/[replacement]/g
- Select some text and go into to visual mode vim will put charaters in the prompt for you, then on the end of that put your search and replace
1
s/[pattern]/[replacement]/
Buffers
Vim buffer editing is a basic vim operation and it goes hand in hand with editing Vim files.
Buffers Are stored in the vim memory, so opening a new file in vim is loading the file into a buffer. The cool thing is the old file you had up is also stored in a buffer and its still there waiting for you. You just need to run some simple vim commands or use a plugin to easily switch back and forth between the buffers.
What is a buffer?
When your editing files in Vim. Keep in mind that you’re editing the memory buffer of a file and not the actual file. This is just how vim works by default.
Open a new empty buffer
This will open a new empty buffer in a vertical split window.
1
:new
Reload current buffer
` :e ` Reload the current document
Open a new empty buffer in a full tab without a split
1
:enew
Refresh the current buffer
1
:e
List Buffers
1
:ls
Rename buffers
1
:saveas new_filename
Renaming terminal buffers are a bit different, as the terminal is not a file.
However, you can rename a terminal buffer with the file command.
1
:file new_name
Hide or close buffer
Without quitting the buffer. Close and Hide will not work if there is only 1 buffer open.
1
:hide
Change buffer file type
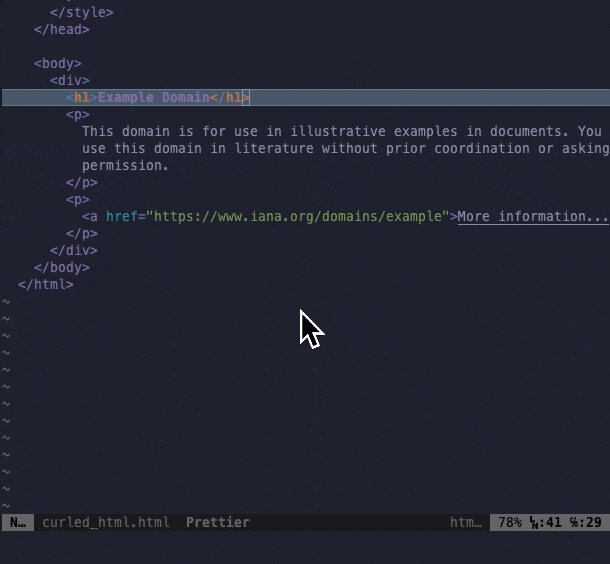
It can be helpful to change the file type of the current buffer. For instance, if you have prettier installed and you have a lot of html mixed into a php file. You can use your html prettier in your php file by changing the file type from php to html.
Change the buffer filetype to html
1
set ft=html
Check the current filetype
1
set ft?
Delete all the open buffers
Before you save a session you want to make sure no unwanted buffers are saved in the session. If your buffer sessions are a mess and contain lots of unwanted buffers you can run:
1
:bufdo bd!
Then open the buffers you want and save your session.
Delete All Buffers Except the Current One
1
:bufdo if bufnr('%') != bufnr('#') | bd | endif
Sessions
Save Session
The :mksession command in Neovim is used to save the current session, which includes information about the state of your editing environment. This allows you to close Neovim and later restore your workspace exactly as it was when you saved it.
ensure your sessions directory exists if not you should create it.
1
:mksession ~/.config/nvim/sessions/mysession.vim
If using Startify for session and buffer management, Startify will save sessions here ~/.local/share/nvim/session/sessionname
Restore Session
1
:source mysession.vim
Ovewrite Session
1
:mksession! mysession.vim
init.vim
If using regualar vim then you want to edit vimrc file. Init.vim is for Neovim and it lives in `~/.config/nvim/init.vim This is your neovim config file. You will be editing this a lot and this file is a work in progress.
- add plugins
- set default behaviour
- Set Key Bindings
My init.vim sample
Note my <Leader> key has been mapped to my spacebar.
1
2
3
4
5
6
7
8
9
10
11
12
13
14
15
16
17
18
19
20
21
22
23
24
25
26
27
28
29
30
31
32
33
34
35
36
37
38
39
40
41
42
43
44
45
46
47
48
49
50
51
52
53
54
55
56
57
58
59
60
61
62
63
64
65
66
67
68
69
70
71
72
73
74
75
76
77
78
79
80
81
82
83
84
85
86
87
88
89
90
91
92
93
94
95
96
97
98
99
100
101
102
103
104
105
106
107
108
109
110
111
112
113
114
115
116
117
118
119
120
121
122
123
124
125
126
127
128
129
130
131
132
133
134
135
136
137
138
139
140
141
142
143
144
145
146
147
148
149
150
151
syntax on
filetype on

" set leader key
let mapleader = "\<Space>"

"prettier
packloadall

let g:prettier#autoformat = 1
let g:prettier#autoformat_require_pragma = 0

"fix php on save
autocmd BufWritePost *.php silent! call PhpCsFixerFixFile()

" set defaults
syntax enable                           " Enables syntax highlighing
set ignorecase                          " ignorecase when searching
set foldenable
set hidden                              " Required to keep multiple buffers open multiple buffers
set nowrap                              " Display long lines as just one line
set encoding=utf-8                      " The encoding displayed
set pumheight=10                        " Makes popup menu smaller
set fileencoding=utf-8                  " The encoding written to file
set ruler              			            " Show the cursor position all the time
set cmdheight=2                         " More space for displaying messages
set iskeyword+=-                      	" treat dash separated words as a word text object"
set mouse=a                             " Enable your mouse
set splitbelow                          " Horizontal splits will automatically be below
set splitright                          " Vertical splits will automatically be to the right
set t_Co=256                            " Support 256 colors
set conceallevel=0                      " So that I can see `` in markdown files
set tabstop=2                           " Insert 2 spaces for a tab
set shiftwidth=3                        " Change the number of space characters inserted for indentation
set smarttab                            " Makes tabbing smarter will realize you have 2 vs 4
set expandtab                           " Converts tabs to spaces
set smartindent                         " Makes indenting smart
set autoindent                          " Good auto indent
set laststatus=0                        " Always display the status line
set nonumber                              " Line numbers
set cursorline                          " Enable highlighting of the current line
set background=dark                     " tell vim what the background color looks like
set showtabline=2                       " Always show tabs
set noshowmode                          " We don't need to see things like -- INSERT -- anymore
set nobackup                            " This is recommended by coc
set nowritebackup                       " This is recommended by coc
set updatetime=300                      " Faster completion
set timeoutlen=500                      " By default timeoutlen is 1000 ms
set formatoptions-=cro                  " Stop newline continution of comments
set clipboard=unnamedplus               " Copy paste between vim and everything else
"set autochdir                           " Your working directory will always be the same as your working directory
set showcmd

au! BufWritePost $MYVIMRC source %      " auto source when writing to init.vm alternatively you can run :source $MYVIMRC

" You can't stop me
cmap w!! w !sudo tee %

"no .swp files
set noswapfile

"set the current open file to be the current working dir
set autochdir

"auto make directory
augroup Mkdir
  autocmd!
  autocmd BufWritePre * call mkdir(expand("<afile>:p:h"), "p")
augroup END

" load neo vim snippets for twig
let g:neosnippet#snippets_directory='~/.vim/bundle/twig.vim/neosnippets'

" plugins
call plug#begin('~/.config/nvim/plugged')
Plug 'plasticboy/vim-markdown'
Plug 'honza/vim-snippets'
Plug 'SirVer/ultisnips'
Plug 'junegunn/fzf', { 'do': { -> fzf#install() } }
Plug 'junegunn/fzf.vim'
Plug 'NeogitOrg/neogit'
Plug 'nvim-lua/plenary.nvim'
Plug 'nvim-telescope/telescope.nvim'
Plug 'sindrets/diffview.nvim'
Plug 'sharkdp/bat'
Plug 'dandavison/delta'
Plug 'preservim/nerdtree'
Plug 'tpope/vim-obsession'
call plug#end()

" save / exit the file
nnoremap <Leader>w :write<CR>
noremap <Leader>q :exit<CR>

" mappings for fzf
nnoremap <Leader>f :Files<CR>
nnoremap <Leader>h :History<CR>
nnoremap <Leader>sh :History/<CR>
nnoremap <Leader>ch :History:<CR>
nnoremap <Leader>S :Snippets<CR>
nnoremap <Leader>b :Buffers<CR>
nnoremap <Leader>C :Colors<CR>
nnoremap <Leader>c :Changes<CR>
nnoremap <Leader>ag :Ag<CR>
nnoremap <Leader>g :Neogit<CR>
nnoremap <Leader>gc :Neogit commit<CR>
noremap <Leader>gf :GFiles?<CR>

" ensure fzf is run from the current working directory
let g:fzf_files_command = 'find . -type f'


" tabs

noremap <Leader>t :tabnew<CR>
noremap <Leader>ts :tabs<CR>
noremap <Leader>tn :tabnext<CR>
noremap <Leader>tp :tabprev<CR>
noremap <Leader>tc :tabclose<CR>


" Nerdtree
noremap <leader>n :NERDTreeFocus<CR>
noremap <leader>nt :NERDTreeToggle<CR>
noremap <leader>nf :NERDTreeFind<CR>


" It can be helpful to add mappings to make moving in and out of a terminal easier once toggled, whilst still keeping it open.

tnoremap <C-h> <C-\><C-n><C-w>h
tnoremap <C-j> <C-\><C-n><C-w>j
tnoremap <C-k> <C-\><C-n><C-w>k
tnoremap <C-l> <C-\><C-n><C-w>l


" Function to find and load a session using fzf
function! FindSession()
  let session_dir = expand('~/.config/nvim/sessions')
  let session_file = fzf#run({'source': 'find ' . session_dir . ' -type f -name "*.vim"', 'sink': 'source'})
  if empty(session_file)
    echo "No session selected."
  endif
endfunction

" Sessions
nnoremap <leader>s :call FindSession()<CR>

"save the session
command! SaveSession execute 'mksession! ~/.config/nvim/sessions/' . input('Session name: ') . '.vim'
Key Bindings
In Neovim, key bindings are set in your configuration file, which is typically located at:
- Linux/macOS: ~/.config/nvim/init.vim or ~/.config/nvim/init.lua
- Windows: C:\Users<YourUsername>\AppData\Local\nvim\init.vim or init.lua
- Using
init.vim(Vimscript format):
You use the nnoremap, inoremap, vnoremap, etc., commands to map keys for different modes:
nnoremap- Normal modeinoremap- Insert modevnoremap- Visual mode
1
2
3
4
5
6
7
8
9
10
11
" Map <Leader>f to find a file using Telescope (normal mode)
nnoremap <Leader>f :Telescope find_files<CR>

" Save file with <Leader>s (normal mode)
nnoremap <Leader>s :w<CR>

" Exit insert mode with `jj` (insert mode)
inoremap jj <Esc>

" Copy selected text to system clipboard (visual mode)
vnoremap <Leader>y "+y
1
2
3
4
5
6
7
8
9
10
11
12
13
14
-- Set leader key
vim.g.mapleader = " "  -- Space as the leader key

-- Normal mode: Find files with Telescope
vim.keymap.set("n", "<Leader>f", ":Telescope find_files<CR>")

-- Normal mode: Save file
vim.keymap.set("n", "<Leader>s", ":w<CR>")

-- Insert mode: Exit insert mode with `jj`
vim.keymap.set("i", "jj", "<Esc>")

-- Visual mode: Copy to system clipboard
vim.keymap.set("v", "<Leader>y", '"+y')
Understanding Key:
The
1
2
In Vimscript: let mapleader = " "
In Lua: vim.g.mapleader = " "
By default,
Plugins
Install plugins with vim-plug.
1
:PlugInstall
Add your plugins to your vim init.vim file, which will live in .config/nvim/init.vim
1
2
3
4
5
6
7
8
9
10
11
12
13
14
" plugins
call plug#begin('~/.config/nvim/plugged')
Plug 'plasticboy/vim-markdown'
Plug 'honza/vim-snippets'
Plug 'SirVer/ultisnips'
Plug 'junegunn/fzf', { 'do': { -> fzf#install() } }
Plug 'junegunn/fzf.vim'
Plug 'NeogitOrg/neogit'
Plug 'nvim-lua/plenary.nvim'
Plug 'nvim-telescope/telescope.nvim'
Plug 'sindrets/diffview.nvim'
Plug 'sharkdp/bat'
Plug 'dandavison/delta'
call plug#end()
NerdTree
Displays your directory file structure in a sidebar
delete files
- open nerdTree
- locate the file you want to delete by scrolling to it in the nerdtree panel
- by first opening the menu with
m - then press
d
FZF
Fuzzy search for files, buffers, text strings.
Ensure your in the current working directory before search
1
:cd %:p:h
or for a persistant fix add to your init.vim
1
let g:fzf_files_command = 'find . -type f'
Commandline
You can run terminal commands from within Vim
To open a terminal window over the top of your current Vim buffer.
1
:term
If your Runing a persistant command like npm watch to exit your terminal command. To exit run Ctrl-\ followed by Ctrl-n. Now you can load buffers or change sessions just as you would in Vim.
If your command has finished running
- You need to get back into Vim insert mode with
Shift I - you can exit the terminal with
:exit
Macros
As a developer, we adopt the philosophy of dry. “do not repeat yourself”. This is what sparked my interest in Vim macros, as macros enable us to automate the repetitive process of certain tasks.
Vim macros allow you to repeat a set of keystrokes with the one keyboard shortcut.
Vim Macros allow you to repeat a set of commands of your choosing.
Vim macros are recordings of vim commands which you can easily repeat back.
The way it works, is you record all of commands and then you can play that recorded command back.
Create a macro
Start recording a new macro called “a”
1
qa
End Recording / macro
to end a recording
1
q
Run a Macro
To run a recording type
1
@a
Execute a Macro multiple times
Repeat macro h 5 times
1
5@h
Execute the last Macro multiple times
Repeat last macro 50 times
1
50@@
See Vim Macros usage example of adding a dash before each line
 vim macros usage example
Macro notes:
- These recordings are stored in registers.
- The recordings will be cleared when you close your buffer.
- The recordings do not persist from buffer to buffer.
Git Commands
1
:vert diffsplit native.php
Reload Vimrc
1
:source ~/.vimrc
Quickscope Plugin
To enhance your content or code editing experience the Quickscope plugin empowers you to move the cursor along your current line to any position. With just a couple of keystrokes.
Now to move to a specific character on a line. You dont need a plugin. But quickscope makes the native vim a little nicer.
I unofficially refer to f, F, t, T, ; and , as the character motions. They form your swiss army knife for moving across a line:
Why use Quickscope?
It will help you break the habit of holding down Vim keys to move back and forward along the line. This is inefficient. Even if you have sped up your vim cursor to move super fast. Quickscope is a faster to navigate your cursor across a page of text.
The three primary Quickscope commands.
- Find/Go forward
- Find/Go backward
- Repeat last motion
Go to a specific character
- Hit
fthen the character you want to move to in the forward direction along your line - Hit
Fthe the character you want to go to in the backwards direction along the line - Hit
,to repeat the last Quickscope motion you performed.
Go before the character
- In the forward direction
tthen the letter you want the cursor to go before - the backwards direction hit
tthen the lefter you want to go before.
Repeating motions
Repeating motions is common as often the character you want to move to is not the first occurrence on the line. Quickscope provides and easy way to repeat your forwards and backwards motions.
,repeats the last character motion in the opposite direction.;repeats the last character motion in the original direction.
Format PHP code
Install plugin
visit the repo for all the information
If you’re using neovim to edit php and you want the php to format itself then you will need some extra thing’s installed to make this work.
Install squizlabs php code sniffer using composer into your project directory
1
composer global require "squizlabs/php_codesniffer=\*"
visit the repo for all the information
In the Vim buffer, run the command to format the php. You should see some indenting happen.
1
:Neoformat
PHP code will also auto format as you move code around the document. Please note Html auto formatting does not work.
Open Large File
Opening SQL database dump files can often cause vim to freeze due to some plugin trying to format the file in someway. To get around this, Vim allows you to switch of the formatting upon opening the file.
1
vim -u NONE large_file.txt
Set Colorscheme
In your neovim init file set the colorscheme. As tokyonight is a plugin, ensure you set the colorscheme after the plugin is loaded in the config file.
1
colorscheme tokyonight
Debugging vim
Make sure the plugin’s files are in Neovim’s runtime path:
1
:echo &runtimepath